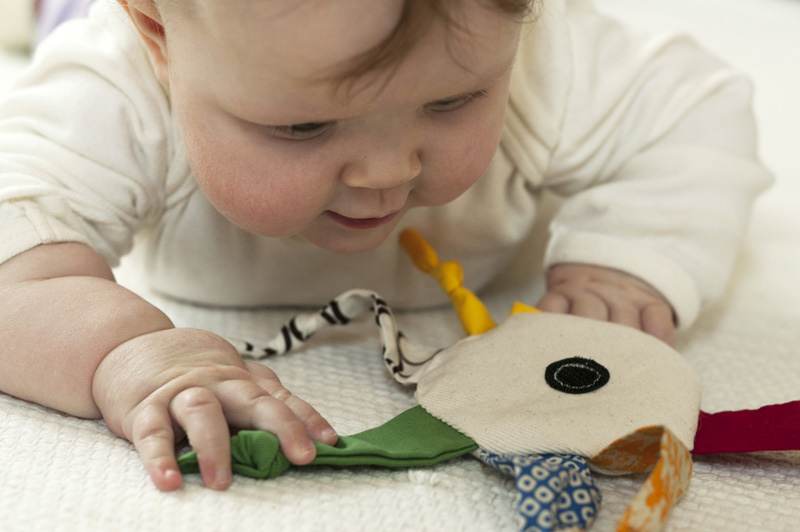
Our baby girl is starting to play with toys! At almost 5 months old, she’s still having a little difficulty holding on to things, and getting the right parts of certain toys into her mouth. So I decided to make her an easy to hold, sun shaped toy, with lots of rays to suck on. I also added a small circle of velcro in the middle, for extra tactile exploration. (I might try attaching something to the velcro later, too.) And finally, I got to add some crinkle, which I’ve been wanting to try. We had a bag of Sun Chips, and some of you told me those worked well. You were right!
So far she’s really having fun with the toy, and it holds her attention for quite a lot time. I have some directions below, if you’d like to try making one. It might even be a good holiday present.
Directions: (See images below.)
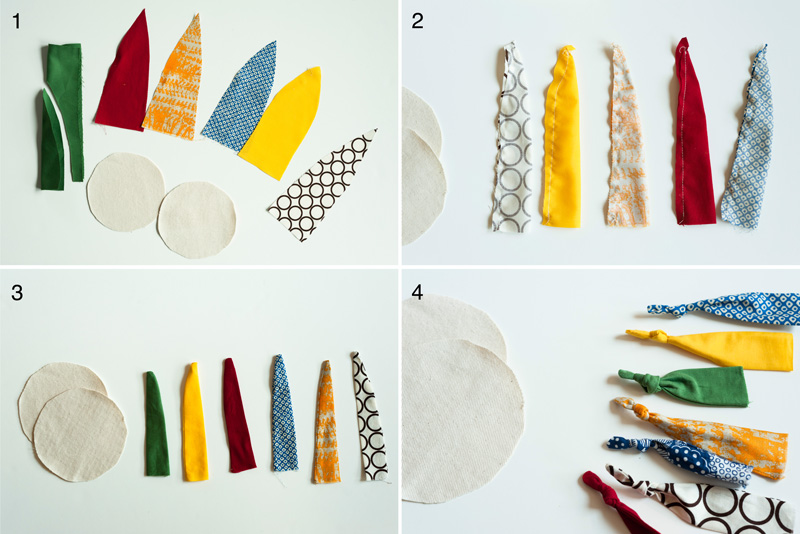
1 – Cut out two circles of fabric for the middle of the sun. (My circles were 5 inches in diameter.) Then cut out 7 rays, by folding some fabric in half, and cutting a long triangle shape. (My rays were about 7 inches in length.)
2 – Fold each ray in half, right side facing in, and sew up the side.
3 – Now turn the rays right-side out. (I used an end of one of my paint brushes to help with this.)
4 – I noticed most baby toys like this have knots in the end, for babies to suck on, and they’re right. (At least my kids like them.) So tie a knot in the end of each ray, if you’d like.
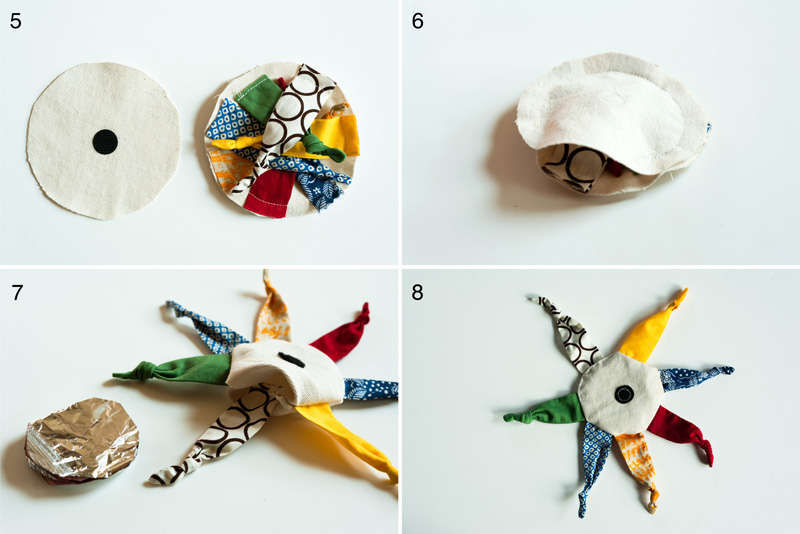
5 – Sew on a circle of velcro in the middle of each circle piece. (Sew on the right side of the fabric.) Then sew the end of each ray, one at a time, to one of the circles. When doing this, sew the rays on the right side of the fabric, and also sew the rays so that they’re pointing to the inside of the circle. (Then later, when you turn it right-side out, they’ll be pointing out.)
6 – Now place the other circle on top of the other circle, right side facing in, and sew around the edge, leaving about an inch un-sewn.
7 – Turn the circle right-side out, and tuck in some crinkle paper if you’d like. (I used a sun chip bag, but I’ve heard that diaper wipe bags work well too.)
8 – Then hand sew the opening shut. Done!
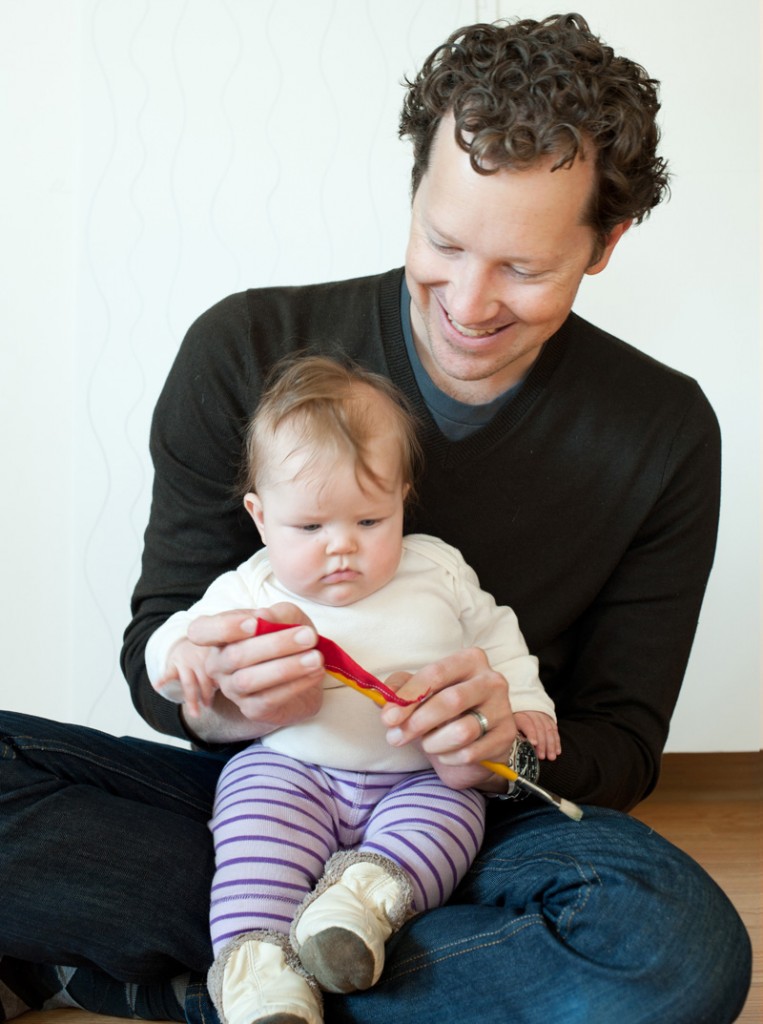
I put her on my lap while turning the rays right-side out, and it was so cute how fascinated she was. Maybe she already knew it was going to be for her.


How cute is this and simple too – need to find some babies to make this for :) Thank you Joel for another clever idea.
oh my god!!! she is so beautiful…congratulations!
you are one great crafty dad.
Oh, how cute she is!
Ooh! I love this one! Isn’t it fun to watch their little gears turn!? And what a cute bebeh!!
What a great toy! I can’t believe she’s 5 months already!
Oh, she’s sweet :)
heh i made something similar last week.. I’m now thinking of making more and making a play mat to attach them too… i just need to make a trip to home depot for Styrofoam insulation tubs to be the inside of the arches to attach toys to..
Thanks everyone! Yeah, we’re having such a great time with her. She’s a sweet baby!
Michelle – Wow, I was also tempted to try making a little arching play mat, but wasn’t sure what material to use for the arches. Let me know how it goes! I’d love to see how you do it!
Will definitely be making one of these for my almost 3 month old today. He is just starting to reach out and grab at toys so he will love this.
this is a great idea!! ill try it asap for my 5months son, Im sure he will love it! you babygirl is soooo sweet :)
Wonderful!!! Both the toy and the baby :)
Oh my, forget the toy – check out that adorably chubby baby! Love her! The toy isn’t bad either.
A HI from Norway to you!
I love your ideas – and that you share them with us!
Here’s what I made to my baby, just a few weeks ago.
http://hopplablogg.wordpress.com/2011/10/13/vognstjerne-av-stoffrester/
Quite similar, also with crincle paper inside, but I used transfer paper to make faces on the sun/star – familiar faces, of course, and I made a star for each member of our family. I also used different types of fabric on each side of each ray.
My star is a bit smaller than your sun, and I have hung one on her car seat, one in her baby pram, and I keep one in the changing bag.
Good idea to tie knots in the end of the rays! My baby would have loved that too!
Wow, I love this Marit! Great idea with the faces. You could even use them as decoration for the holidays. They look fantastic! I should try experimenting with transfer paper too. So many possibilities!
wonderful!!!!
Now that is such a cutie!!! And I like your project too!!! I can’t believe how that little one has grown she is a sweetie pie!!!
She is SO cute! And the toy is lovely!
Bookmarking this for my newborn’s Christmas gift–I have made various “chew toys” in the past, but I really like all the grabby options on this sun shape. And your baby is absolutely precious–what a doll!
Such lovely toy! This is a great idea. Thanks.
i’m totally into these kind of toys as my little boy is almost 7 months
your little girl is so cute and the sun ray….as simple as great!
tnx
Wanted to share my finished baby play-mat with arch’s of course the more toys i make the more i can swap them out :P http://brokenperfection.com/2011/11/13/diy-baby-play-mat/
[…] Make your own children’s toys. Check your closet or hit up Value Village for some vintage fabrics and start sewing. Hand sewing […]
Definitely making these for my little Lucy this Christmas. What a great way to use up some of the Amy Butler fat quarters I’ve been hoarding!
I LOVED this idea! I embroidered a smiling face on mine and I stuffed the faces with fiberfill. I gave one to a 7 month old baby yesterday and she played and played with it! It made a huge hit! GREAT IDEA! Thanks!
[…] one as a gift – but as you can see it didn’t turn out as colorful and awesome as the original tutorial. I will definitely be making another one. In the meanwhile, Hayden will be my guinea pig for […]
and this is my little 8 months boy playing with ‘yuour’ toy
http://www.equazioni.org/index.php/2011/12/12/giochini-morbidi-per-piccolissimi/
tnx!!
Hi Joel, I am a cousin of Shannon’s mom and ran across your website while “surfing”. Saw Shannon at her dad’s wedding last yr. and knew you were having a little girl in June. I saw her picture on your site–what a cutie! What did you name her?
Your work/avocation is so exciting. I’m very happy for all of you. Give Shannon my love.
Nancy Carlton
Thanks Nancy! Nice to hear from you. I’ll send you an email too!
Thanks for the tutorial!!
It’s great, I try to do it! http://www.enganxetada.blogspot.com/2012/01/sol-solet.html
Wow, that looks great!
I just love LOVE all the stuff you make! Super easy and fun! and your baby is just the cutest!
[…] burada şirin mi şirin tam yemelik bir bebek güneş oyuncağının keyfini sürüyor. Sizde bebekleriniz için yapmak ister misiniz ? Reklam : Etiketler: baby bebekler için craft dıy el yapımı elişi fabric fabric sun güneş güneş yapımı handmade hobi kumaş güneş kumaştan oyuncak make oyuncak oyuncak güneş oyuncak yapımı parça kumaşlardan sun toy tutorial […]
[…] Babyknotensonne von Made by Joel Dieser Beitrag wurde von Janka geschrieben und am 17. März 2012, um 07:00 Uhr veröffentlicht. Er ist den Kategorien Nähkästchen und den Schlagworten Baby, Geschenkidee, nähen, Nähmaschine, Stoff, [Nachmachtipp] zugeordnet worden. Speichere den Permalink. Verfolge die Kommentare im RSS-Feed zu diesem Beitrag. Schreibe einen Kommentar oder hinterlasse einen Trackback. « Vorheriger Beitrag Nächster Beitrag » […]
Joel, thank you for this pattern/idea. I made 3 yesterday. Two are in the mail. One going to daughter in Belgium and one to daughter in Florida. I posted a photo on my Facebook page. Hope that is okay. Have your link there, too.
That’s great Patti! Cool!
Thank you Joel for such an awesome project! Here is my attempt….my little chap loves it!
http://vintagemagpiebaby.blogspot.co.uk/2012/06/sun-ray-toy.html
[…] Stacking Ring Toy from Spearmint Baby Soft Baby Toy from curious kangaroo Sun Ray Toy from Made by Joel […]
[…] to make it stiffer. A sun-toy for Pablo A great idea for babys using fabric scraps taken from Joel, a great crafter. Frames for organizing the pantry A dress/top and a matching headband […]
[…] DIY Baby Sun Ray Toy When your baby is starting to hold onto things, this toy is very easy to grab on to and explore. […]
[…] Forrás: https://madebyjoel.com/2011/11/diy-baby-sun-ray-toy.html […]
[…] foto: madebyjoel […]
[…] Ideju aizguvu no šī tēta! […]
[…] Get the free tutorial here, via Made by Joel […]
You can also use a popcorn wrapper as a crinkler (if that’s what you call it)
Great idea!
Hello sir! Do you have a video of this craft? Its so cute. I want to make one. Thank you.
Hi Carole. Thanks! And no, I don’t have a video for this one. If you look at the photos though, I think you can do it pretty easily. Give it a try!
[…] https://madebyjoel.com/2011/11/diy-baby-sun-ray-toy.html […]